
Here are some very easy instructions for making a quilt hanging sleeve
This is the way all EPQ members will be required to make the hanging sleeve for any quilts entered in our 2013 Eastwood Patchwork Quilters Biennial Exhibition. There is also a You Tube video if you are like me and need to actually see how this is done. Thanks to Maureen for these great instructions.
- Cut or piece together fabric to make a strip 9″ tall and the same width as the quilt.
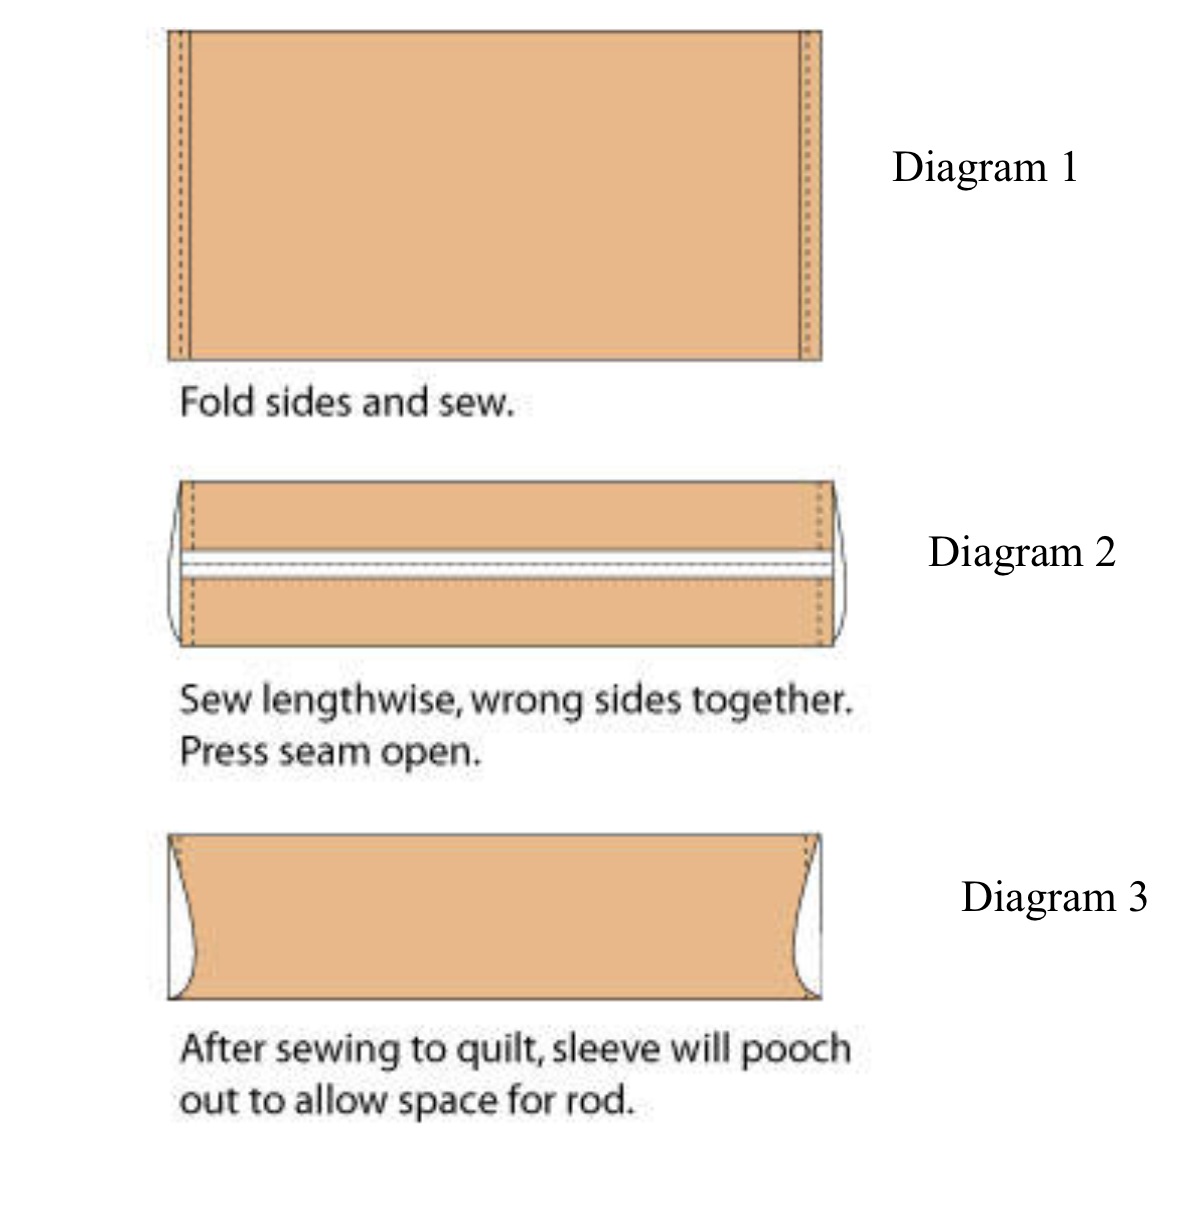
- Fold under short edges 1/4″, wrong sides together. Fold under again. Press. Sew a straight or zigzag seam to hem the folds. (diagram 1)
- Now fold the strip lengthwise, wrong sides together, aligning its raw edges. Sew together with a 1/2″ seam allowance. Press the seam allowance open. (Diagram 2)
- Place the open seam against the quilt’s back. Center and pin the top edge of the tube to the back of the quilt, about 1/2″ below the binding.
- Use a whipstitch to sew the top edge of the tube to the quilt backing. Stitch into the batting occasionally to help strengthen the seam.
- Smooth the sleeve downward along the quilt back, then make a 1/2″ fold along its length to create a pleat. Leaving the pleat intact, pin the sleeve bottom to the quilt.
- Whipstitch the lower edge of the sleeve to the quilt. Remove pins. The sleeve will pooch out a bit to allow space for a hanging rod. (Diagram 3)
- Whipstitch the back sides of the sleeve to the quilt. Leave the front sides unsewn to allow for rod insertion.
| Here is a link to a great video by AQS Executive Show Director Bonnie Browning
https://www.youtube.com/watch?v=m_Vd82aSiAA&feature=player_embedded |
